Friday, June 24, 2011

Professional Maternity Pics Preview!!

My very sweet friend Amy Schildknecht is building her photography business in Las Vegas and asked me to model for her maternity portfolio so of course I said yes! If you are looking for an amazing newborn, family or maternity photographer please visit her website: http://eliteimagesbyamy.com/ and also like her page on Facebook: HERE

Here are a few previews from our shoot:


Thanks so much Amy!!


Wednesday, June 15, 2011

Nursery DIY #5- Barbie Prints

So in all my Nursery inspiration searching I came across these amazing vintage Barbie prints HERE for $135.00 (yea right):


So of course I started searching for ways to DIY my own version of these... I was lucky enough to find some copies of prints on Ebay for $5-$11 each since they weren't 1st quality but I knew they would be above the crib so it wouldn't really matter!

I ordered the 4 pink and black themed girls and when they arrived I went and bought frames at Michaels $11 each after coupons (which was still more than I wanted to spend but it was the cheapest I could find anywhere and since they were black I wouldn't have to paint them!) Then I had to fit the prints into the frames:

Photobucket


Photobucket


Photobucket


Then I traced and cut out the oval shape out of the print-
Photobucket


Then I mounted the print into the frame and hung it-
Photobucket


It looks as if the bow is what is holding up the frame when really it's a nail holding up the heavy picture frame, the bow is held up with just a push pin and the tails of the bow are just tucked behind the frame!

The final result:

Nursery DIY #4- Name Decal above Crib

So I love the look of Nursery Decals, especially with the name over the crib like this:
Photobucket

But there was no way I was going to pay $45 for something I could DIY for $5. So I found some various text options and took a poll on which script people liked best... #2 was the winner!
Photobucket

I thought I could use contact paper and use a printer to print the name backward on the back of the contact paper sheets but when I tried that the contact paper melted on the printer drum (much to my husband's dismay lol) but once he cleaned that up he suggested a better way which was to print the name right on the clear overhead projection paper and cut the name out from there like this:


I tested various sizes and found I liked the look of this the best (this is what the whole sheets looked like on the wall before I cut out the letters)-

Once the letters were cut out I just used rubber cement to hold them to the wall (they are so lightweight you don't need anything stronger). Here's the finished look:

Nursery DIY #3- Outlet Covers

Since we spent so much time painting those dang stripes I just hated the thought of plain beige outlet covers clashing... So I did some internet browsing and the only ones I found acceptable were $16 each (craziness)! So I figured I could DIY some for a lot less!!

I started with the same roll of textured wallpaper that I used for the DIY toy chest (see that post here: )

This time I painted the base of the paper with one of the rejected pink samples I considered for the wall stripes:
Photobucket

Then I took a sparkle stamp pad and gently ran it over the top of the paper so only the raised portion of the wallpaper picked up the darker pink color:
Photobucket

Once that was dry I traced the shapes of the outlet covers on the back of the paper and then cut them out:
Photobucket

I then used rubber cement to glue the wallpaper on top of the existing covers and rubber bands to hold it in place while it dried (if I did it again I would probably use a stronger adhesive):
Photobucket

Make sure to paint the hardware/screws too-
Photobucket

Finished Product-
Photobucket

And the covers on the wall:
Photobucket

I did these for the light switch plates too:
Photobucket

And if you're super safety conscious and/or you don't need to access the outlets you can do a full cover like this... The ultimate baby proofing, lol-
Photobucket

Nursery DIY #2- Changing Table

I got this changing table still new in the box on craigslist for $40 (current sale price at Sears $140) which was the perfect shape (the arch matched the shape of the arch on my crib) but the problem was it was brown not black:


So what's a crafty mama to do? Reach for a can of glossy black spray paint and go to town!!


Now that it is all black I just needed to build it...


I felt the arch was a little plain and again I wanted to mirror the detail in the crib so I found these scrapbook stickers at Michaels for $2.99 and made a design-


The finished back board!


And the finished Changing table:


The baskets were another DIY project that I will upload pics for soon!

Super Shopping Nursery Bargains!!

I am a huge bargain shopper and have no problems searching garage sales, resale shops, and goodwill for amazing deals on items I can re-purpose or impove...

Here are a few of the bargains I found for the Nursery that give it an expensive look for less!!

#1- Curtains!
I found these at Goodwill for $5
Photobucket

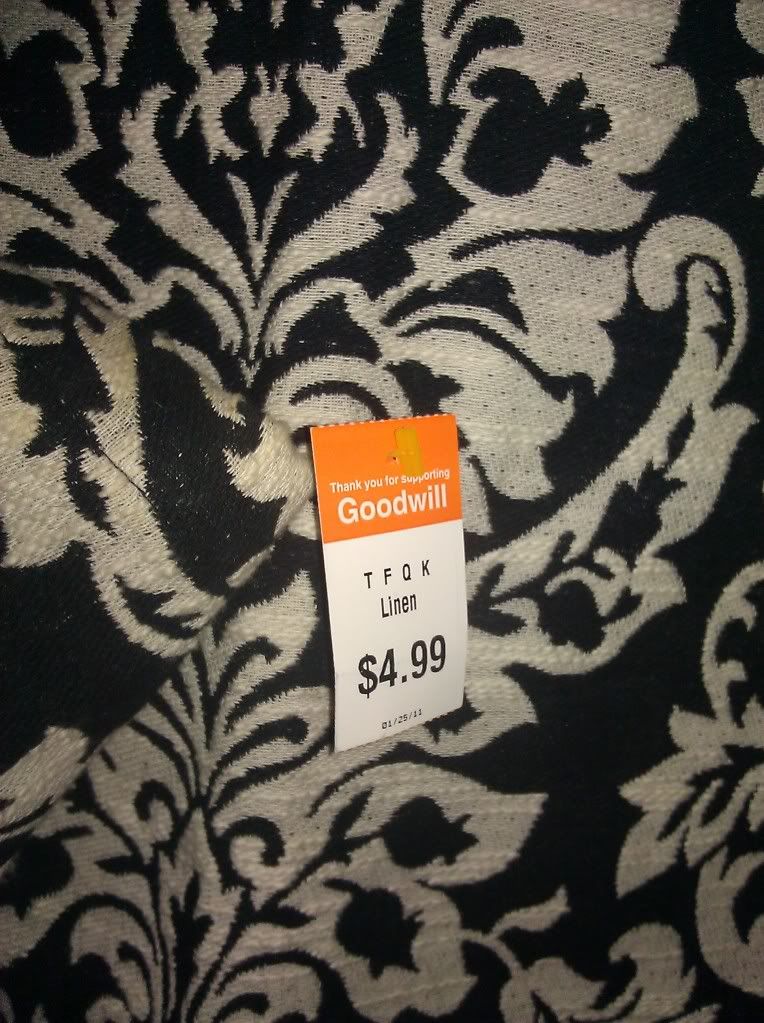
I did spend $10 having them dry cleaned but for $15 they gave me the perfect color combo and look that I wanted!
Photobucket

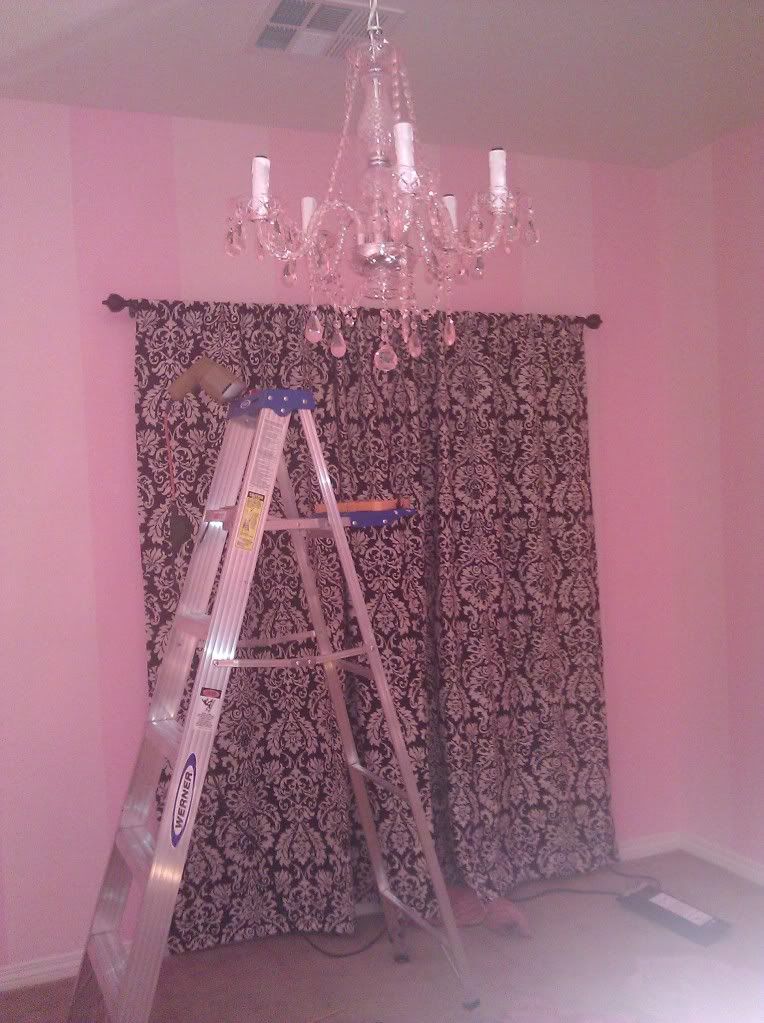
I also found a rod at a garage sale for $5 that I spray painted and added bishop end caps from BBB that were $7 for the set. I just couldn't decide how to tie them back:


I ended up adding tying them in the middle and adding bows (shocking I know)-


Finished look:


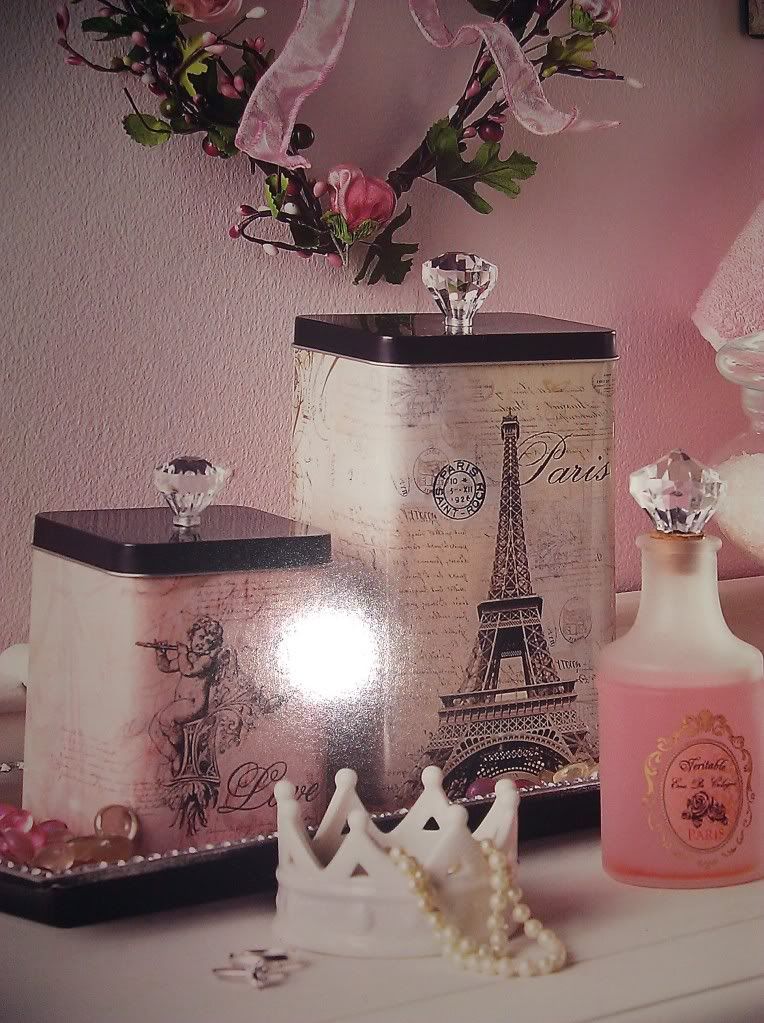
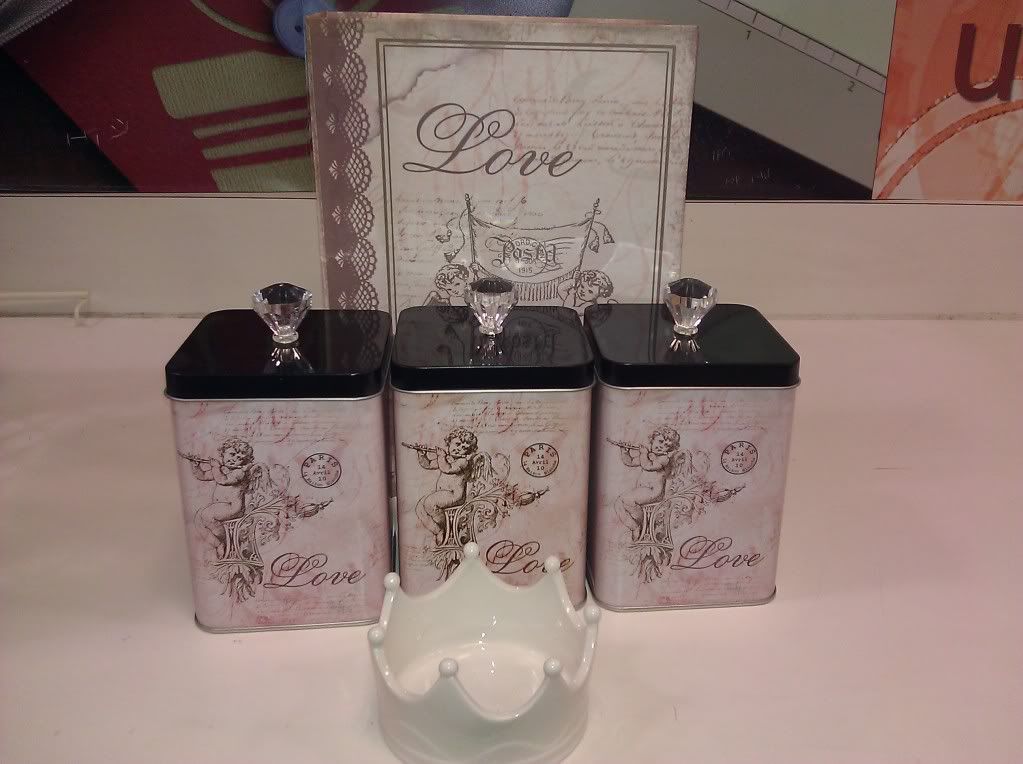
#2- Dresser accessories!

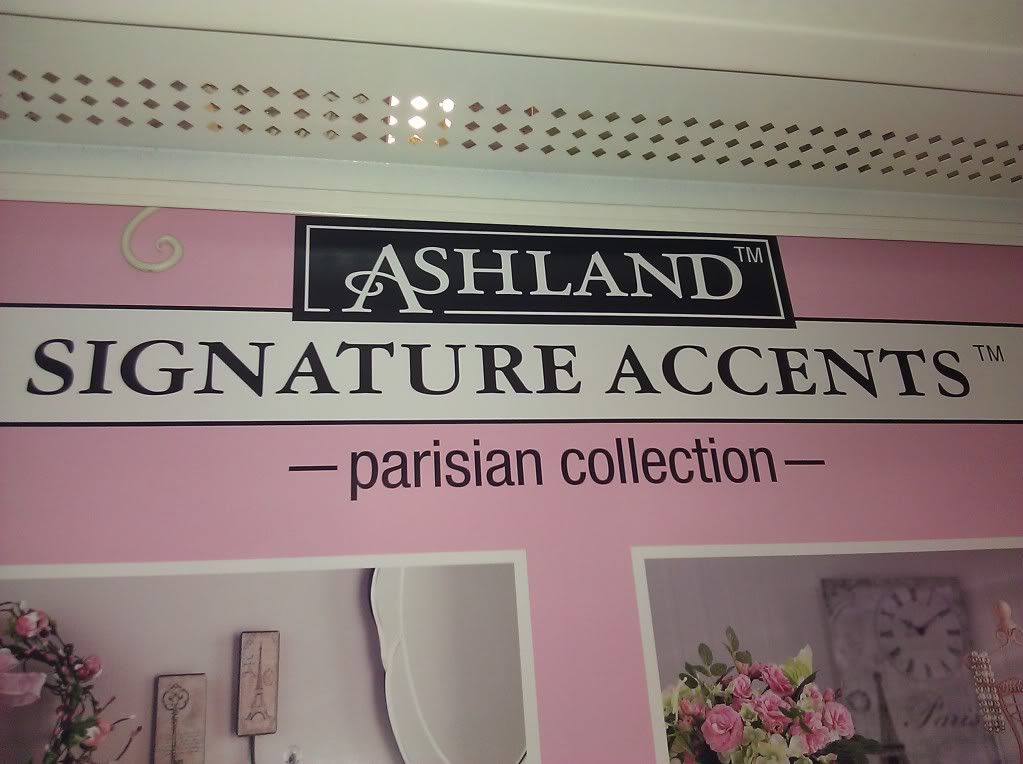
I came across this collection at my local Michael's that just happened to fit perfectly into my Parisian Poodles theme!
Photobucket

Even better the whole collection was on clearance at 75% off so I went from store to store to see if they had the items in their beautiful display:
Photobucket

Store #1 Haul (Total spent $8.64)
Photobucket

Store #2 Haul (Total spent $12.30)
Photobucket

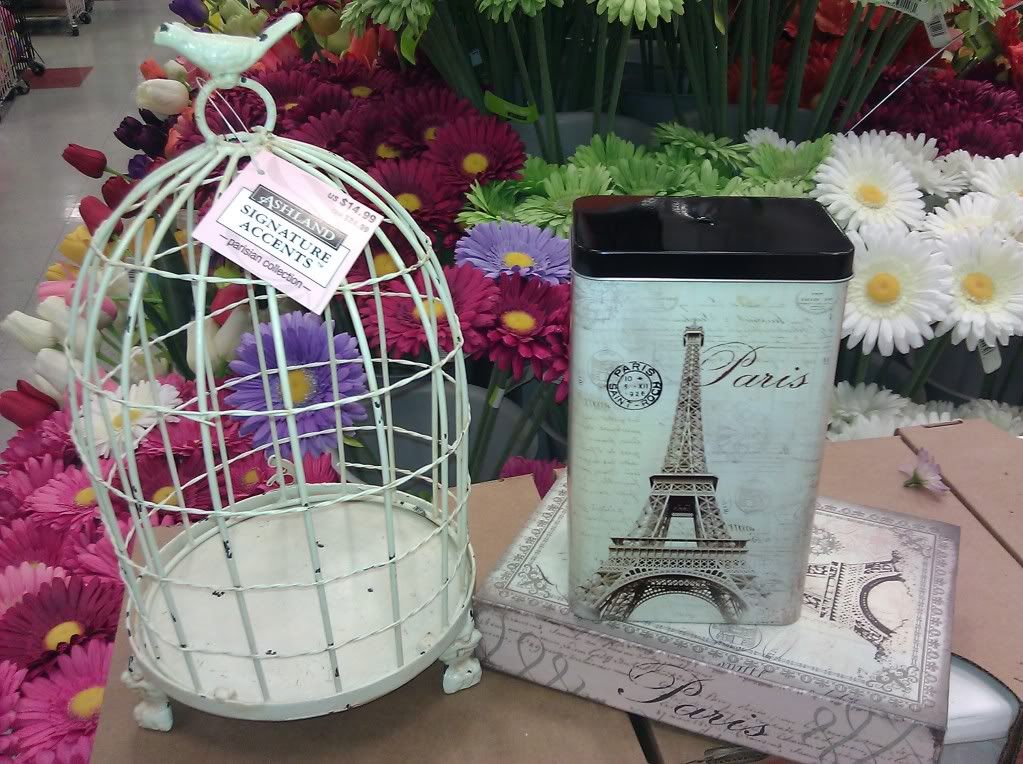
I hung the birdcage in the corner of the room and added some ceramic birds also from Michael's-


I used the "books" and ceramic crown on the dresser-


I used some of the metal tins to store things on the diaper changing table-


Bargain #3 is actually in the picture above it's the wrought iron dress form from Ross that was $19.99!!


That's all for now!

Ladies and Gentlemen we have paint on the walls!

Well we finally got started on the Nursery!!

I knew I wanted to do alternating pink stripes but I had no idea where to start! After seeing this AMAZING baby boy nursery done by Jen at Scissors and Spatulas I emailed her asking what width she chose for her stripes and it turned out that 12 inches was the magic number...


So for us the first step was picking paint... But there are so many choices:
Photobucket

Since the home improvement stores offer samples in a pint size for $2 so I did a bunch of test painting in the closet to find the perfect combination:
Photobucket

We ended up choosing these colors-
#1 The Darker Pink was Valspar Semi Gloss from Lowes in "Oh so Pink":


#2 The Lighter Pink was Beher Semi Gloss from Home Depot in "Southern Beauty":


To make the stripes extra sharp we (my handy hubby and I) not only taped off the walls but also used painters caulk to seal the tape and prevent the colors from bleeding!
Photobucket

You really have to get the paint onto the walls to see the colors because they look so different on the samples than they do on the walls!
Photobucket

Almost done with one wall:
Photobucket

And the finished project walls: