Wednesday, June 15, 2011

Ladies and Gentlemen we have paint on the walls!

Well we finally got started on the Nursery!!

I knew I wanted to do alternating pink stripes but I had no idea where to start! After seeing this AMAZING baby boy nursery done by Jen at Scissors and Spatulas I emailed her asking what width she chose for her stripes and it turned out that 12 inches was the magic number...


So for us the first step was picking paint... But there are so many choices:
Photobucket

Since the home improvement stores offer samples in a pint size for $2 so I did a bunch of test painting in the closet to find the perfect combination:
Photobucket

We ended up choosing these colors-
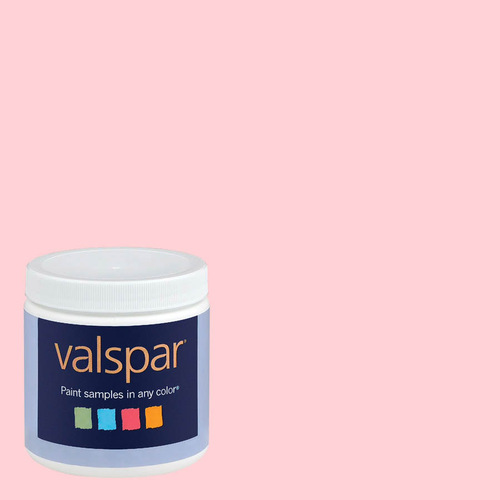
#1 The Darker Pink was Valspar Semi Gloss from Lowes in "Oh so Pink":

#2 The Lighter Pink was Beher Semi Gloss from Home Depot in "Southern Beauty":


To make the stripes extra sharp we (my handy hubby and I) not only taped off the walls but also used painters caulk to seal the tape and prevent the colors from bleeding!
Photobucket

You really have to get the paint onto the walls to see the colors because they look so different on the samples than they do on the walls!
Photobucket

Almost done with one wall:
Photobucket

And the finished project walls:

I found a Glider!! (For only $20)

Originally I was wanting this glider in black and pink gingham which was $180 at Babies R Us:


Then today I took a bunch of the clothes Brady had out-grown to my favorite resale shop and came across this gem!

Photobucket

With their store credit program I was able to exchange the clothes that I was no longer using for $65 in store credit making this glider only $20 out the door! It needed a good cleaning and some TLC but it ended up fitting in the nursery perfectly...


I was glad I kept it white because I found a great side table for $5 at a garage sale (which also needed a good scrubbing) but they work together well in this nursing/reading corner of the nursery!

Nursery DIY #1- Toy Chest

This was a super fun Trash to Treasure Project!


BEFORE:
Photobucket

AFTER: Photobucket

First thing I did was remove the hardware and sand down the chest:
Photobucket

I started with this textured floral wall paper that was $11 on Amazon: http://www.amazon.com/gp/product/B0026T3GBI/ref=ox_sc_sfl_title_4?ie=UTF8&m=ATVPDKIKX0DER

I painted a shimmer hot pink base coat making sure to get in all the nooks and crannies:
Photobucket

Then I went over it with a shimmer black color very lightly so the color was only picked up on the raised portion of the wallpaper:
Photobucket

The finished paper:
Photobucket

I cut the paper into strips to fit the chest:
Photobucket

Then secured those with glue:
Photobucket

I did the same thing on the bottom, added the hardware back on and was done!!
Photobucket

And here's the finished chest in Juliette's Nursery!

Nursery Splurges!

SO my intent is to do Juliette's Nursery on a budget, because why spend tons of money on things I can make myself or buy used? But we did decide to "splurge" on 3 big statement items that were essential for giving the room the luxe feel I wanted: The Crib, The Dresser and the Chandelier!

I knew my colors were going to be pink and black because the Ooh La La bedding I picked out had black as one of the main colors! I searched and ended up finding this crib in a baby store next to our 3D ultrasound place!
Ta Da-
Photobucket

And the matching Dresser-
Photobucket


Both are part of the "Savannah Collection" from Munrie

The Crib is one of those 3-in-1 convertible cribs that goes into a toddler bed and then into a full sized bed when she grows so I think it was worth the investment!

Final Crib Look:


Final Dresser Look:


Our 3rd investment piece was actually a gift from my parents so it didn't cost us anything but I think it's a big part of what gives the nursery an elegant girly feel- Our Pink Chandelier!


We found this at the Sam Moon Home store in Dallas for about $200, but it totally makes the room pop!

Tuesday, June 7, 2011

Bad Blogger!!

So I have been a bad, bad blogger... Not that I think that many people really read this blog but when I created it the main idea was to upated friends and family on my pregnancy before we made things public... Once the secret was out I pretty much took to Facebook and the like to keep people updated and when I found myself cooking and crafting I was just posting things there because lets face it- doing it that way is so much easier!

Now that I am 33 weeks pregnant and on bedrest for contractions and being 2cm dilated I have some time to play catch up so you can expect some great posts with crafts and projects (mostly nursery and baby related) that lead up to finishing Juliette's nursery!

Get Excited!